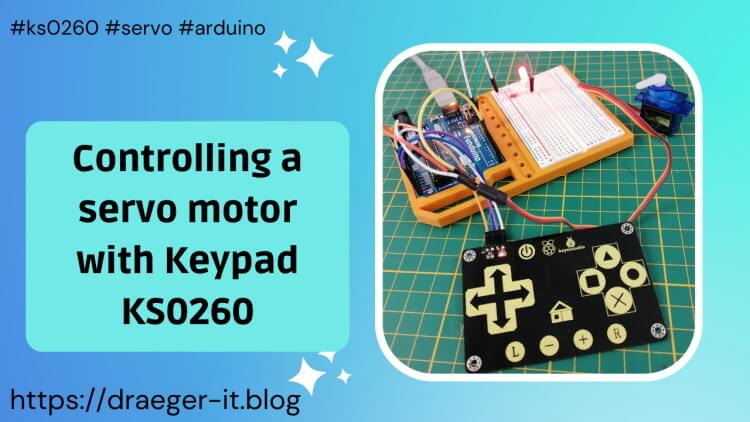
In this post, I want to show you how to control a servo motor with the Touch Keypad KS0260 from Keyestudio.
In the last post Touch Keypad (KS0260) with 16 keys for Arduino & Raspberry and in the YouTube video Programming Keyestudio Touch Keypad KS0260 on Arduino UNO I already introduced the keypad and showed you how to connect it to the microcontroller.

Now we will look at how you can evaluate the keys and control a servo motor.
I have already shown you how to control a servo motor on the Arduino in several articles, e.g. Arduino, Lesson 16: Controlling a Servo.
Resources needed for this small project
If you want to build this project, you will need:
- a microcontroller like the Arduino UNO,
- a USB data cable,
- a servo motor e.g. SG90,
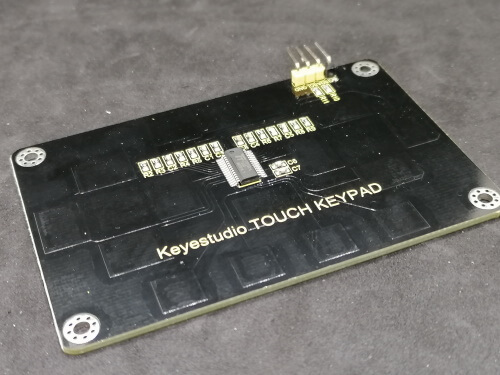
- a touch keypad KS0260,
- three breadboard cables 10 cm, male to male,
- four breadboard cables 10 cm, male – female.
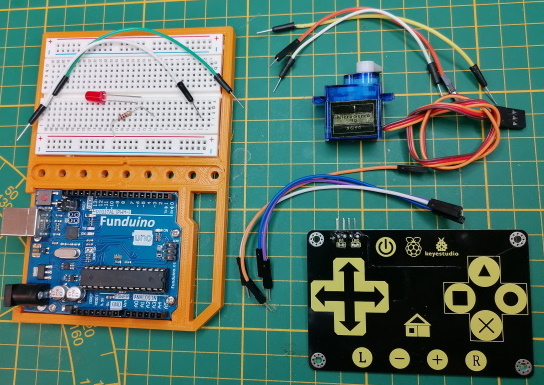
I also have a small 5 mm LED incl. series resistor and breadboard cable, which will later be connected to the digital pin D13 and will represent the power LED.
Connection and programming
In the following YouTube video I have explained how to connect this small project to the Arduino UNO and how to program it with the Arduino IDE.

Connection to the Arduino
The servo motor type SG90 can be connected directly to the Arduino. If you use a bigger one, you have to look into the data sheet first, in order not to destroy your microcontroller.
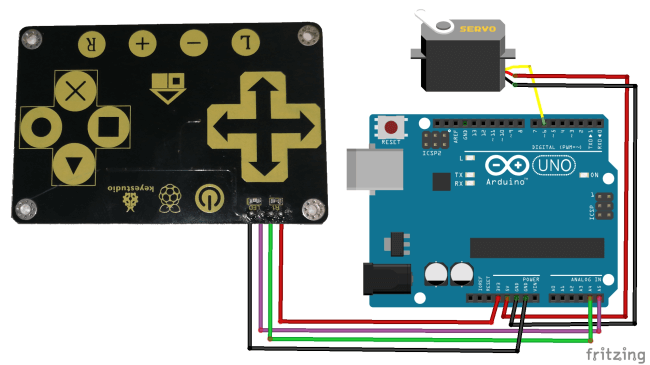
Here is the small connection diagram.
| Component | Arduino UNO |
|---|---|
| Servomotor – SG90 | |
| DATA | digital pin D6 |
| VCC | 5 V |
| GND | GND |
| Touch Keypad – KS0260 | |
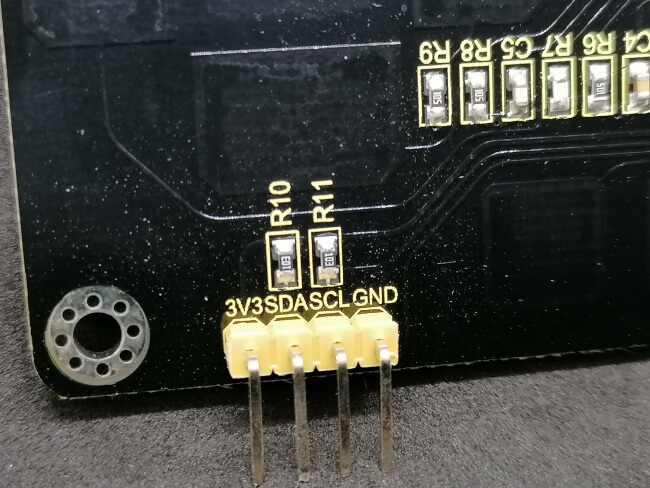
| 3V3 | 3.3 V |
| SDA | analogue pin A4 |
| SCL | analogue pin A5 |
| GND | GND |
Programming
For programming on the Arduino you need a small library, which you can either download from the manufacturer’s wiki page or you can use my modified version and have the additional advantage that you can access the values of the buttons more easily.
How to integrate a ZIP file into the Arduino IDE is explained in detail in the article Arduino IDE, Integrating a library.
To be able to control the servo motor via Arduino, we also need a library, which we can easily install with the library manager. For the installation via the library manager, we first select the icon from the left menu bar, then we search for “Servo” and press the “INSTALL” button on the entry “Servo by Michael Margolis, Arduino”.
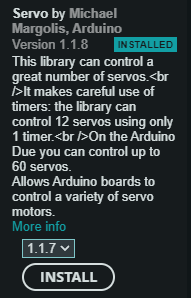
If necessary, additional libraries have to be installed, here you should confirm this installation!
In the programme I have also implemented the function that if you tap on the cross (X), the current position is saved. If you click on the house / home symbol again, you will return to this position.
//Bibliothek zum ansteuern von Servo
#include <Servo.h>
//Bibliothek zum ansteuern bzw. auslesen des gedrückten
//kapazitiven Touch Feldes auf dem KS0260 Modul
#include "TTP229L_I2C.h"

//der Servomotor ist am digitalen Pin D6 angeschlossen
#define servoPin 6
//eine rote, 5mm LED ist am digitalen Pin D13 angeschlossen
#define powerLed 13

//Servo Objekt erstellen (noch nicht initialisiert)
Servo servo;
//Variable zum speichern von der aktuellen Position
int position = 0;
//Zeit zum pausieren zwischen den einzelnen Schritten des Servos
const int waitTime = 50;

//Feld zum speichern des Zustandes, ob die Schaltung
//aktiviert == true, oder
//deaktiviert == false ist
bool powerOn = false;

//Feld zum speichern einer Position
int storedPosition = 0;

//Klasse mit den Konstanten zu dem KS0260 Modul
KS0260Buttons btns = KS0260Buttons();

//Funktion zum aktivieren / deaktivieren der Power LED
//am digitalen Pin D13
void setLedStatus() {
  digitalWrite(powerLed, powerOn);
}

void setup() {
  //der Pin des Servosmotors als Ausgang definieren
  pinMode(servoPin, OUTPUT);
  //der Pin der Power LED als Ausgang definieren
  pinMode(powerLed, OUTPUT);
  //initial die Power LED deaktivieren
  setLedStatus();
  //setzen des Servo Objektes auf den digitalen PIN 6
  servo.attach(servoPin);
}

void moveServo(int pos) {
  //setzen des aktuellen Positionswertes am Servomotor
  servo.write(pos);
  //eine kleine Pause
  delay(waitTime);
}

//Funktion um das Ruderhorn des Servomotors auf die
//gespeicherte Position (Feld storedPosition) zu bewegen
void moveToHome() {
  //Wenn die aktuelle Position kleiner als die gespeicherte
  //Position ist, dann...
  if (position < storedPosition) {
    //eine Schleife von der aktuellen Position zu der gespeicherten
    for (int pos = position; pos <= storedPosition; pos++) {
      moveServo(pos);
    }

  } else {
    //Wenn die aktuelle Position größer als die gespeicherte
    //Position ist, dann...
    for (int pos = position; pos >= storedPosition; pos--) {
      moveServo(pos);
    }
  }
  //überschreiben des Wertes in dem Feld position mit dem gespeicherten Wert
  position = storedPosition;
}

void loop() {
  //lesen des aktuell betätigten Tasters
  unsigned int data = TTP229_i2c_read();
  //Wenn nicht 2 oder 0, dann...
  //2 & 0 wird abwechselnd ausgegeben und hat keine Funktion
  if (data != 2 && data != 0) {
    //Switch über den Wert von data
    //hier könnte man auch mit einem If-Statement arbeiten
    switch (data) {
      //Wenn die Taste Power betätigt wurde
      case btns.button_power:
        //Umkehren des boolschen Wertes
        powerOn = !powerOn;
        //aktualisieren der Power LED
        setLedStatus();
        //eine kleine Pause von 50 ms. um den Taster zu entprellen.
        delay(50);
        break;
      //Wenn die Taste links betätigt wurde
      case btns.button_left:
        //Wenn der Wert für powerOn Wahr/True/1 is UND die aktuelle
        //Position kleiner 180 ist, dann den Wert für die Position
        //um eins erhöhen
        if (powerOn && position < 180)
          position++;
        break;
      //Wenn die Taste rechts betätigt wurde
      case btns.button_right:
        //Wenn der Wert für powerOn Wahr/True/1 is UND die aktuelle
        //Position größer 0 ist, dann den Wert für die Position
        //um eins verringern
        if (powerOn && position > 0)
          position--;
        break;
      //Wenn die Taste X / Kreuz betätigt wurde dann soll die aktuelle
      //Position gespeichert werden.
      case btns.button_cross:
        storedPosition = position;
        //verlassen der Funktion an dieser stelle
        return;
      //Wenn die Taste Home betätigt wurde, dann soll zu der
      //letzten gespeicherten Position gefahren werden.
      case btns.button_home:
        moveToHome();
        return;
    }

    //Wenn die Schaltung aktiv & die Position zwischen 0 und 180 liegt,
    //dann soll zu dieser Position gefahren werden.
    if (powerOn && position < 180 && position > 0) {
      moveServo(position);
    }
  }
}
Letzte Aktualisierung am: 03. May 2023