In diesem Beitrag möchte ich dir zeigen, wie du deinen Quellcode mithilfe von ChatGPT fast automatisch umstrukturieren (engl. Refactoring) lassen kannst.

Die künstliche Intelligenz ChatGPT kann dich bei der Entwicklung von Software sehr gut unterstützen und bietet dir die Möglichkeit zu bestehendem Code Inline Kommentare, neue Features oder auch wie ich dir nachfolgend zeigen möchte ein Refactoring deines Quellcodes an.
Was ist Refactoring von Code?
Beim Refactoring oder zu Deutsch dem Umstrukturieren von Quellcode organisiert man den Code neu, ohne dass dieser an Funktionalität verliert.
Ziel des Refactoring ist es, dass die Lesbarkeit, Wartbarkeit und die Erweiterbarkeit verbessert wird.
Wenn du mehr über das Refactoring von Quellcode lesen möchtest, dann empfehle ich dir den Wikipedia Artikel:
Seite „Refactoring“. In: Wikipedia – Die freie Enzyklopädie. Bearbeitungsstand: 27. Mai 2022, 08:02 UTC. URL: https://de.wikipedia.org/w/index.php?title=Refactoring&oldid=223200456 (Abgerufen: 27. April 2023, 10:48 UTC)
Refactoring anhand eines Beispiels
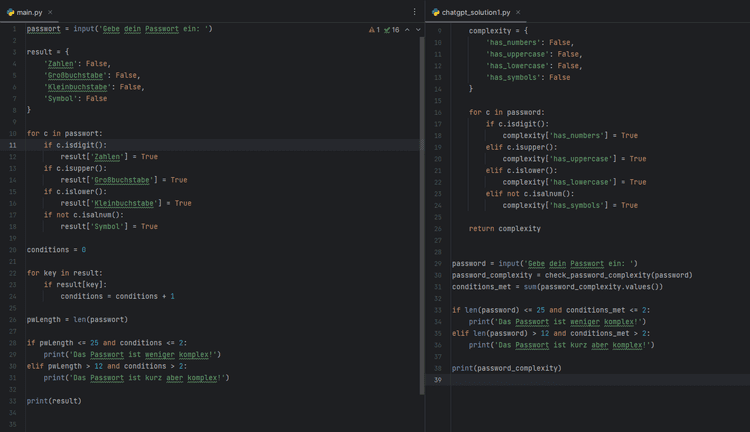
Starten wir mit einem kleinen Programm, welches wir von ChatGPT umstrukturieren lassen möchten.
Das kleine Pythonskript soll ein Passwort auf Komplexität prüfen. Der Benutzer gibt auf der Konsole ein Passwort ein und dieses wird dann auf die Vorkommnisse von Zahlen, Groß-/Kleinbuchstaben sowie Symbolen geprüft. Zum Schluss erfolgt eine Auswertung, ob dieses Komplex genug ist.
passwort = input('Gebe dein Passwort ein: ')

result = {
    'Zahlen': False,
    'Großbuchstabe': False,
    'Kleinbuchstabe': False,
    'Symbol': False
}

for c in passwort:
    if c.isdigit():
        result['Zahlen'] = True
    if c.isupper():
        result['Großbuchstabe'] = True
    if c.islower():
        result['Kleinbuchstabe'] = True
    if not c.isalnum():
        result['Symbol'] = True

conditions = 0

for key in result:
    if result[key]:
        conditions = conditions + 1

pwLength = len(passwort)

if pwLength <= 25 and conditions <= 2:
    print('Das Passwort ist weniger komplex!')
elif pwLength > 12 and conditions > 2:
    print('Das Passwort ist kurz aber komplex!')

print(result)
Der Code ist so wie er steht lauffähig, aber kann noch verbessert werden. Dieses wollen wir uns von ChatGPT umsetzen lassen.
Normalerweise würde man vor dem Refactoring noch Unittests erstellen, um sicherzustellen, dass der Code wie gewünscht funktioniert.
Wie du Unittest mit ChatGPT erstellen kannst, zeige ich dir noch in einem weiteren Beitrag.
Refactoring von ChatGPT
Ich starte nachfolgende Anfrage und gebe zusätzlich noch den Hinweis, dass die CleanCode Regeln beachtet werden sollen. Bei ChatGPT gilt, je genauer man die Anfrage stellt, umso besser wird das Ergebnis.
Mache nachfolgenden Code eleganter und beachte dabei die CleanCode Regeln:
passwort = input('Gebe dein Passwort ein: ')

...
Als Ausgabe erhalte ich ein Pythonscript, welches um 5 Zeilen länger ist, aber deutlich aufgeräumter und lesbarer daherkommt.
Was aber noch fehlt, sind die Inline Kommentare. Diese können wir uns auch generieren lassen, indem wir die passende Anfrage stellen.
Erzeuge mir noch zusätzlich die Inline kommentare.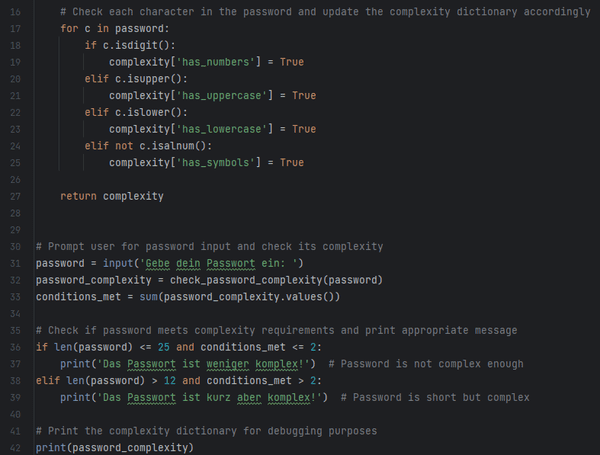
Ergebnis von ChatGPT
Nachfolgend findest du jetzt den neuen Code, welcher durch ChatGPT optimiert wurde. Zusätzlich wurden noch Inline Kommentare hinzugefügt.
def check_password_complexity(password):
    """
    Checks the complexity of a password and returns a dictionary with the following keys:
    - 'has_numbers': True if password contains at least one digit, False otherwise.
    - 'has_uppercase': True if password contains at least one uppercase letter, False otherwise.
    - 'has_lowercase': True if password contains at least one lowercase letter, False otherwise.
    - 'has_symbols': True if password contains at least one non-alphanumeric character, False otherwise.
    """
    complexity = {
        'has_numbers': False,
        'has_uppercase': False,
        'has_lowercase': False,
        'has_symbols': False
    }

    # Check each character in the password and update the complexity dictionary accordingly
    for c in password:
        if c.isdigit():
            complexity['has_numbers'] = True
        elif c.isupper():
            complexity['has_uppercase'] = True
        elif c.islower():
            complexity['has_lowercase'] = True
        elif not c.isalnum():
            complexity['has_symbols'] = True

    return complexity


# Prompt user for password input and check its complexity
password = input('Gebe dein Passwort ein: ')
password_complexity = check_password_complexity(password)
conditions_met = sum(password_complexity.values())

# Check if password meets complexity requirements and print appropriate message
if len(password) <= 25 and conditions_met <= 2:
    print('Das Passwort ist weniger komplex!')  # Password is not complex enough
elif len(password) > 12 and conditions_met > 2:
    print('Das Passwort ist kurz aber komplex!')  # Password is short but complex

# Print the complexity dictionary for debugging purposes
print(password_complexity)
Der komplette Chatverlauf mit ChatGPT
Nachfolgend findest du den kompletten Chatverlauf mit ChatGPT.
Letzte Aktualisierung am: 27. April 2023