In this post, I like to show how to connect and code a digital temperature sensor DS18B20 at Arduino UNO.
I’ve shown you in my last blog post Arduino Lesson #5 – analog temperature sensor LM35DZ an analog temperature sensor. Here you get some information how to connect the digital sensor DS18B20.
Required components for samples with sensor DS18B20 at Arduino
To rebuild the following samples, you need:
- a microcontroller from the Arduino-Family like Arduino UNO R3*, Arduino Nano*, etc.
- USB datacable*,
- digital temperature sensor DS18B20*,
- 4,7 kOhm Resistor*,
- 400 Pin Breadboard*,
- some breadboardwires*, male-male, 10 cm
Note from me: The links marked with an asterisk (*) are affiliate links. If you make a purchase through these links, I will receive a small commission to help support this blog. The price for you remains unchanged. Thank you for your support!
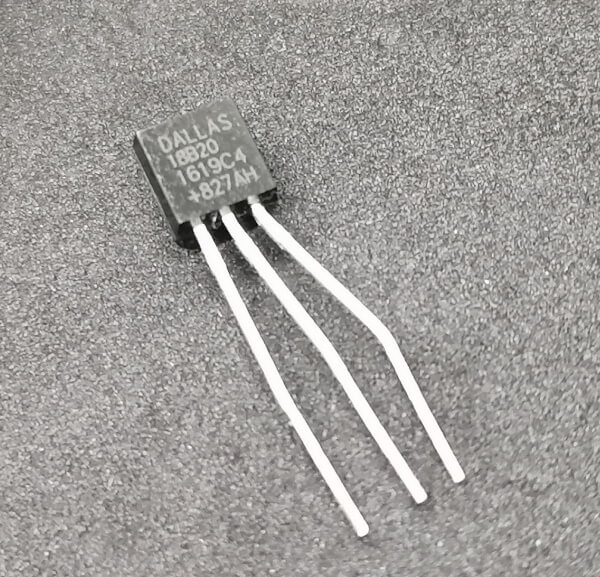
Types of sensor DS18B20
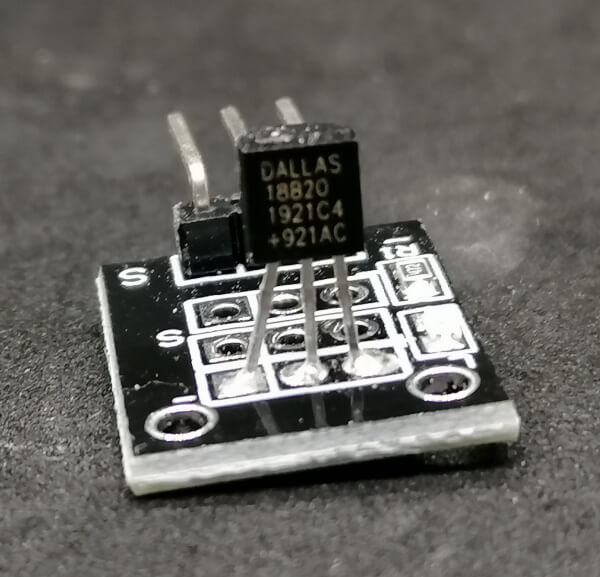
In addition, you can get the TO92 device on a small board, which eliminates the need for cumbersome and error-prone wiring.

Technical data of DS18B20
- Measurement range -55 °C to +125 °C
- nominal voltage 3 V to 5,5 V DC
- current consumption 1 mA
- design TO-92
- resolution 9-bit
Pinout digital temperature sensor DS18B20
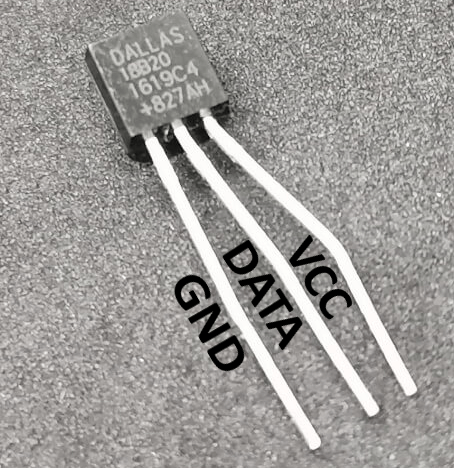
The tiny sensor DS18B20 has three legs, when you look at the case you will see a flat side and a rounded side. At the flat side you find the specifications. To get the right pinout, please lay down this part at the rounded side, so the flat side is up.
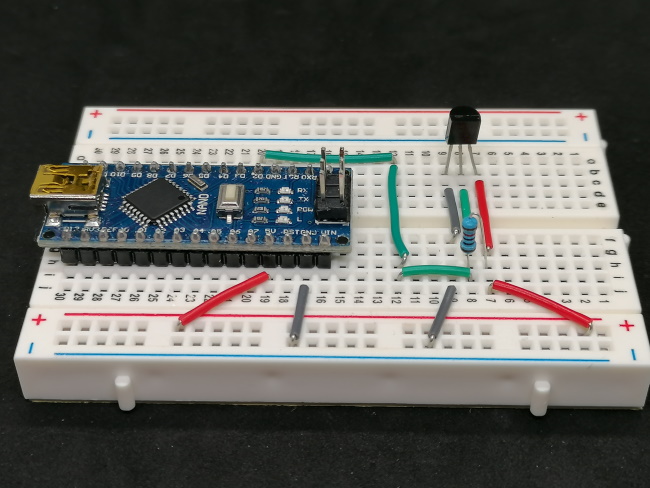
Connect DS18B20 to Arduino
For the next circuit it’s not required if you use an Arduino UNO, Nano, Micro or others, it will work for all of them.
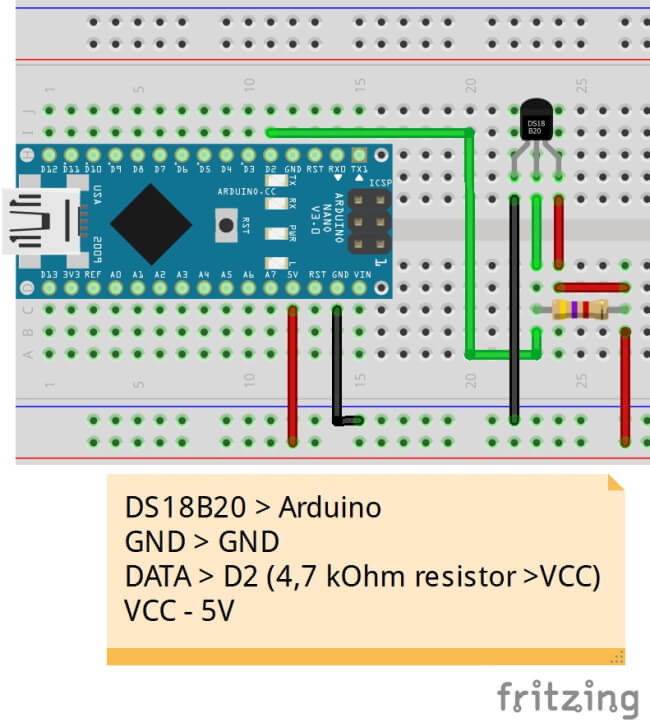
Every sensor has an own address, so you can connect more than one sensor at the same digital pin.
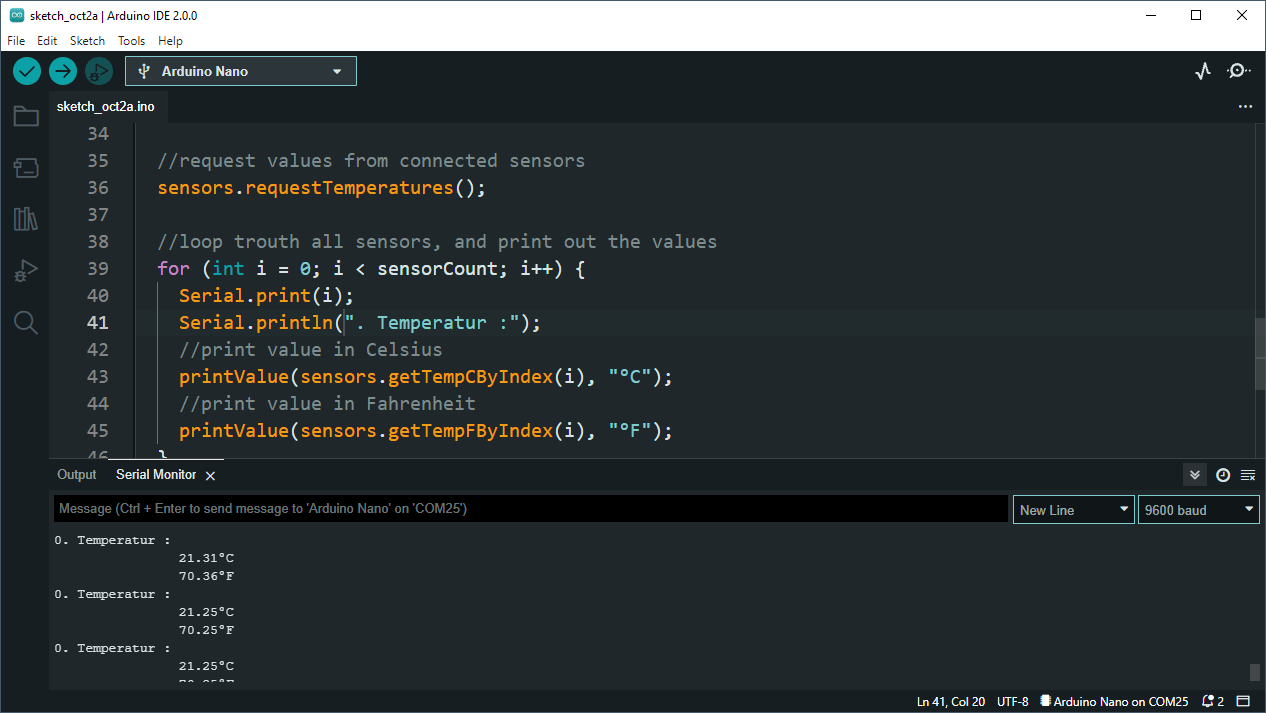
Sample – read values from sensor DS18B20
Here you can find a short sample to read all sensor data from connected sensors.
//library to read values from sensor DS18B20
#include <OneWire.h>
#include <DallasTemperature.h>

//sensor connected to digital pin D2
#define ONE_WIRE_BUS 2

//create instance and attach pin
OneWire oneWire(ONE_WIRE_BUS);

//create instance of DallasTemperature and attach instance of OnWire
//connection
DallasTemperature sensors(&oneWire);

//numbers of sensors
int sensorCount;

void setup(void) {
  //start serial communication with 9600 baud
  Serial.begin(9600);
  Serial.println("digital temperatursensor - DS18B20");
  //start communication with sensor
  sensors.begin();
  //read out the number of connected sensors
  sensorCount = sensors.getDS18Count();
}

void loop(void) {
  //if no sensor was found, then...
  if (sensorCount == 0) {
    Serial.println("No sensor found!");
    Serial.println("Please check connection!");
  }

  //request values from connected sensors
  sensors.requestTemperatures();

  //loop trouth all sensors, and print out the values
  for (int i = 0; i < sensorCount; i++) {
    Serial.print(i);
    Serial.println(". Temperatur :");
    //print value in Celsius
    printValue(sensors.getTempCByIndex(i), "°C");
    //print value in Fahrenheit
    printValue(sensors.getTempFByIndex(i), "°F");
  }

  //make a short brake for 1 second
  delay(1000);
}

//function to send a formatted text to serial interface
void printValue(float value, String text) {
  Serial.print("\t\t");
  Serial.print(value);
  Serial.println(text);
}
The code above will print the values to
Letzte Aktualisierung am: 10. March 2024