In this post, I like to show, how to control a tiny servo motor like the SG90 with an Arduino UNO.
Required components for circuit
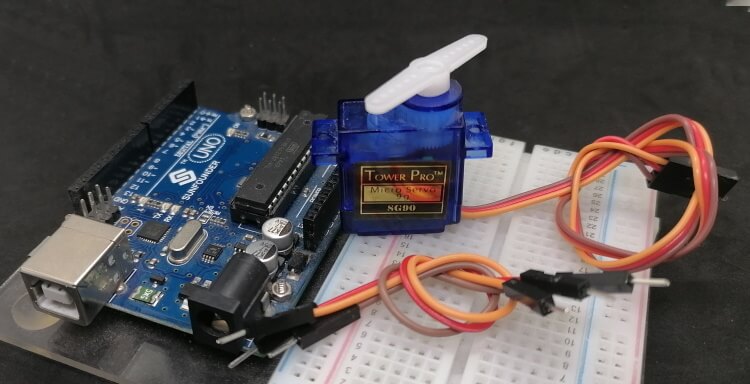
To rebuild the circuit, you need:
- an Arduino UNO R3,
- USB-Typ-B datacable (like for printer or scanner),
- a tiny servo motor SG90,
- three breadboard wires, male – male, 10 cm,
Types of servo motors
At the market, you can find some different types of servo motors. The main different is the weight and power and current consumption of them.
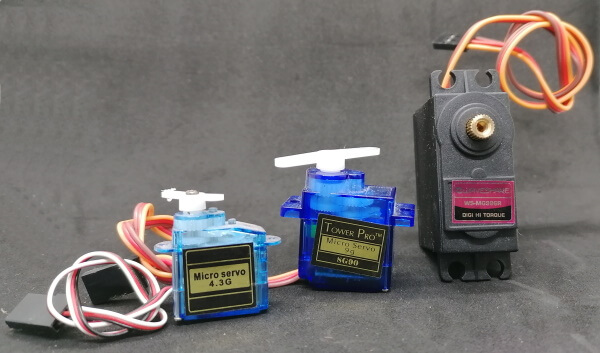
The small servos with 4.3g and 9g can be connected directly to the Arduino microcontroller, they do not consume more than the maximum 50mA. The big one in this picture needs 3A current and needs an external power supply.
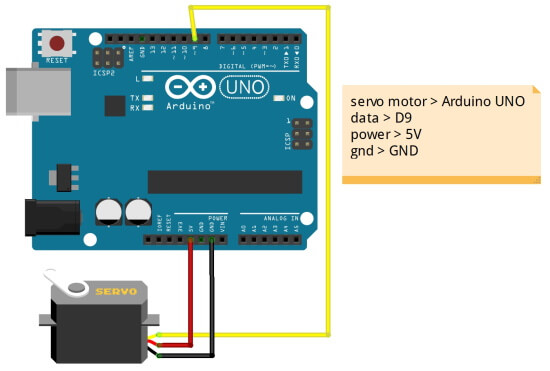
Pinout servo motor connector
The connector of the servo motor have three pins.
- orange / white is for data,
- red for power line,
- brown / black for GND
Coding in Arduino IDE
In my last post Arduino Lesson #1 – setup & install Arduino IDE I show you how to set up the Arduino IDE 2.0 at your computer. In this post, I like to show how to code a servo motor of type SG90.
Required library to simple control a servo
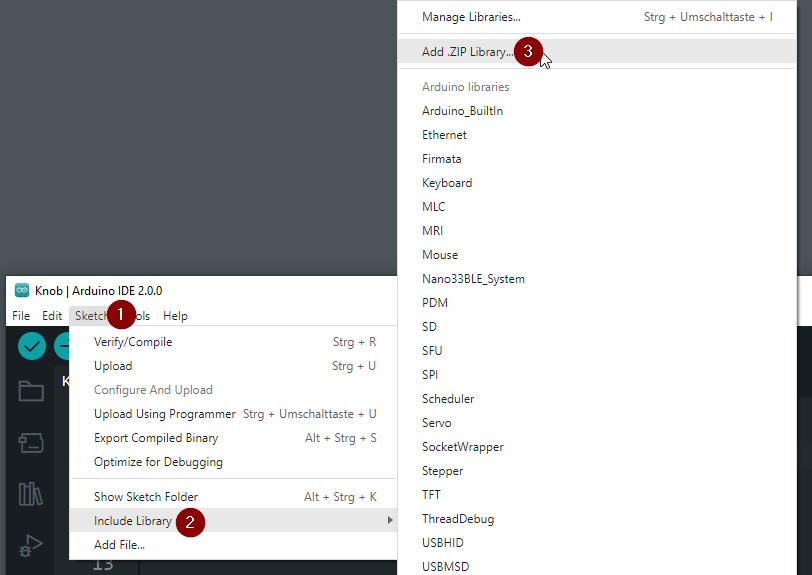
To simple code and control a servo motor you need a library. In my case I use the servo library from GitHub Repository arduino-libraries/Servo, you can download the hole library as ZIP-File.
If you have downloaded the ZIP-File, you have to import this via the Arduino IDE 2.0 from “Sketch” (1) > “Include Library” (2) > “Add .ZIP Library…” (3).
Example – how to control a servo motor
Now it’s time for a small example. First, we want to move the servo in a loop from zero to 180 degrees.
Here is now the tiny Sketch to move a servo motor forward and backward.
#include <Servo.h>

//data line from servo to digital pin D9 connected
#define servoPin 9

//create servo object
Servo servo;

void setup() {
  //attach servo to object
  servo.attach(servoPin);
  //begin serial communication with 9600 baud
  Serial.begin(9600);
}

void loop() {
  //from 0 to 180, do
  for (int i = 0; i <= 180; i++) {
    //write servo position
    setServoPosition(i);
  }

  //from 180 to 0, do
  for (int i = 180; i > 0; i--) {
    //write servo position
    setServoPosition(i);
  }
}

//print the actual position at the serial interface
//and set / write servo position
void setServoPosition(int pos) {
  Serial.println("write position " + String(pos, DEC) + " to servo.");
  servo.write(pos);
  delay(35);
}
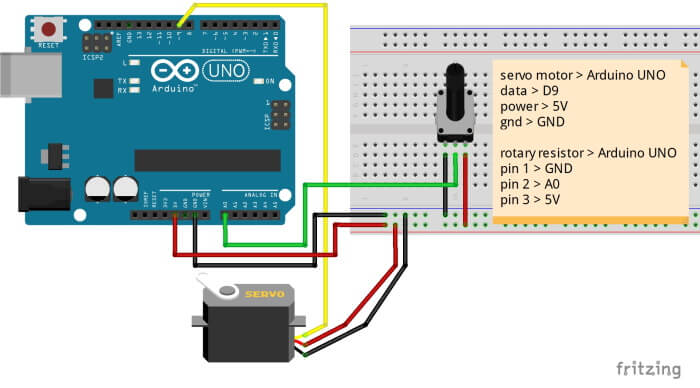
Control servo motor with rotary resistor
Next, I like to show how to control a servo motor with a 50 kOhm rotary resistor.
For the new circuit, you also need:
- three Breadboardwires,
- one 50 kOhm rotary resistor
Here is my short program to control a servor motor with a rotary resistor.
#include <Servo.h>

//data line from servo to digital pin D9 connected
#define servoPin 9
//rotary resistor connected to analog pin A0
#define resistor A0

//create servo object
Servo servo;

int lastServoPosition = -1;

void setup() {
  //attach servo to object
  servo.attach(servoPin);
  //begin serial communication with 9600 baud
  Serial.begin(9600);
}

void loop() {
  //read actual resistor value
  int value = analogRead(resistor);
  //map value (between 0 to 1023) to degrees from 0 to 180
  int resistorValue = map(value, 0, 1023, 0, 180);
  //if the last stored servo position is not equal to the actual
  if (lastServoPosition != resistorValue) {
    //store the actual value
    lastServoPosition = resistorValue;
    //set actual servo position
    setServoPosition(resistorValue);
  }
}

//print the actual position at the serial interface
//and set / write servo position
void setServoPosition(int pos) {
  Serial.println("write position " + String(pos, DEC) + " to servo.");
  servo.write(pos);
  delay(35);
}
Letzte Aktualisierung am: 29. April 2023