In this new blogpost I like to show how to code a NTC Thermistor at Arduino device.
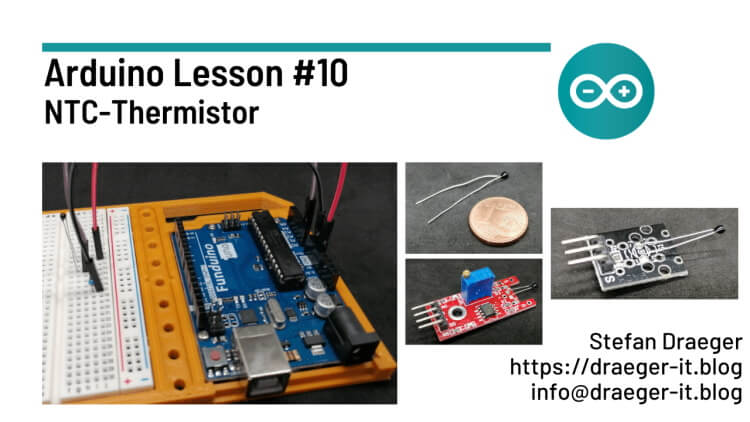
An NTC resistor (Negative Temperature Thermistor) is a temperature-dependent resistor. By means of a voltage divider circuit, one can measure the temperature with this component.

An NTC resistor has a negative temperature coefficient, i.e. this component conducts the electric current better at high temperatures than at low ones.
Buy NTC Thermistor
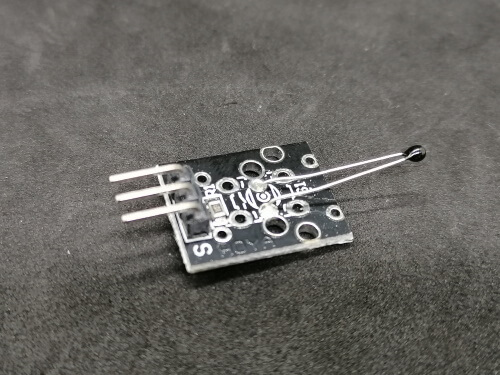
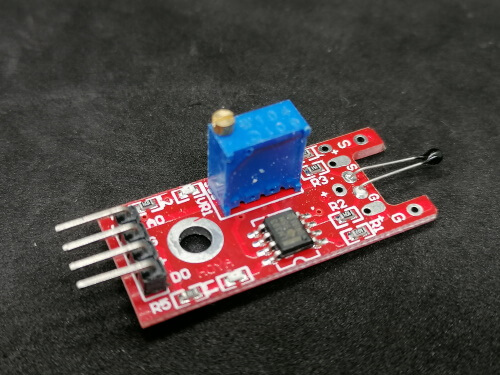
You can buy a NTC Thermistor as simple component or at a pcb with pre soldered 10 kOhm Resistor (ready to connect).
- simple component*,
- ready to use pcb* (analog only),
- ready to use pc* (with digital output for threshold)
Note from me: The links marked with an asterisk (*) are affiliate links. If you make a purchase through these links, I will receive a small commission to help support this blog. The price for you remains unchanged. Thank you for your support!
Technical data of an NTC resistor
The technical data of an NTC resistor are very clear, because this component is in the figurative sense “only” a resistor which changes its resistance value with a temperature change. The nominal resistance of 10kOhm is always specified here at a temperature of 25 °C.
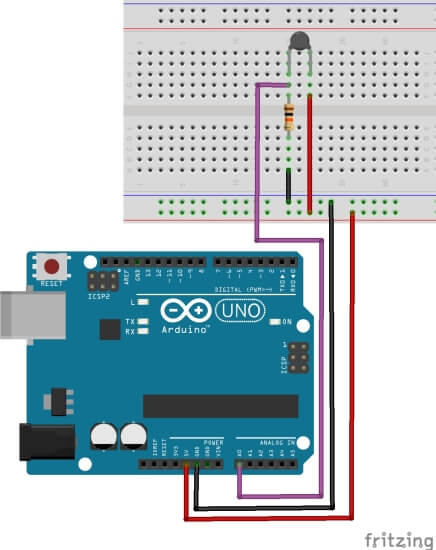
Circuit
For the following circuit I use a 10kOhm NTC resistor and a 10kOhm carbon resistor. If you use a 100 Ohm NTC resistor, you must also use a 100 Ohm carbon resistor and so on.
As already mentioned, the circuit is a voltage divider circuit where you measure the voltage at 2 points and then compare them.
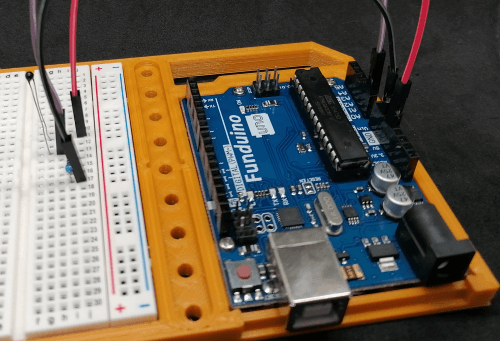
Structure of the circuit
To build the circuit, you need:
- 1x Arduino UNO*,
- 1x breadboard with at least 170 pins*, better still 400 pins,
- 1x carbon film / metal film resistor with 10 kOhm*,
- 1x NTC resistor* with 10 kOhm,
Coding
Determining the resistance value at the analogue output
Firstly, we need to determine the value of the NTC resistor. The Arduino board does not have a resistance meter built in, but rather a voltmeter. We can apply voltages of max. 5V to the analogue pin, and this is then displayed in values from 0 to 1023.
This results in the following simple sketch for determining the resistance value:
// NTC-Thermistor with 10 kOhm
const int NTC_THERMISTOR_VALUE = 10000;
// maximum value of an analoge value
const int MAX_ANALOG_VALUE = 1023;

// NTC-Thermistor is connected to analog Pin A0
#define PIN A0

void printValue(String text, float value, String text2 = "") {
  Serial.print(text);
  Serial.print(value);
  Serial.println(text2);
}

void setup(void) {
  //begin of serial communication with 9600 baud
  Serial.begin(9600);
}

void loop(void) {
  //real current value from NTC-Thermistor
  float value = analogRead(PIN);
  printValue("analog Value: ", value);

  // convert analog value to thermistor value
  // later we need this value to calculate the temperature
  value = (MAX_ANALOG_VALUE / value) - 1;
  value = NTC_THERMISTOR_VALUE / value;
  printValue("NTC-Thermistor Value: ", value, " Ohm");

  //tiny break for 1 Second
  delay(1000);
}
Video
Converting the resistance value into a temperature value
In the first step we have determined the resistance value of the NTC resistor, now we want to convert this value into a temperature value. In the book “Sensors in use with Arduino” there is a relatively simple formula (unfortunately without explanation) in the tutorial from Adafruit there is an example of how this is calculated with the Steinhart-Hart formula. Personally, I find the solution from the book much more streamlined and readable.
#include <math.h>

const int NTC_THERMISTOR = 10000;
const int MAX_ANALOG_VALUE = 1023;

#define PIN A0

void printValue(String text, float value, String text2 = "");

void setup(void) {
  Serial.begin(9600);
  Serial.println("Time\t\t|Kelvin\t\t|Celsius\t|Fahrenheit\t|Ohm");
  Serial.println("-------------------------------------------------------------------------");
}

void loop(void) {
  float analogValue = analogRead(PIN);

  // Konvertieren des analogen Wertes in ein Widerstandswert
  float resistorValue = (MAX_ANALOG_VALUE / analogValue) - 1;
  resistorValue = NTC_THERMISTOR / resistorValue;

  double kelvin = convert2TempKelvin(analogValue);
  double celsius = convertKelvin2TempCelsius(kelvin);
  double fahrenheit = convertCelsiusToFahrenheit(celsius);

  printValue(kelvin, celsius, fahrenheit, resistorValue);
  delay(1000);
}

double convert2TempKelvin(float value) {
  double temp = log(((10240000 / value) - NTC_THERMISTOR));
  temp = 1 / (0.001129148 + (0.000234125 * temp) + (0.0000000876741 * temp * temp * temp));
  return temp;
}

double convertKelvin2TempCelsius(double kelvin) {
  return kelvin - 273.15;
}

double convertCelsiusToFahrenheit(double celsius) {
  return celsius + 32;
}

void printValue(double kelvin, double celsius, double fahrenheit, float ohm) {
  Serial.print(millis());
  Serial.print("\t\t|");
  Serial.print(kelvin);
  Serial.print(" K \t|");
  Serial.print(celsius);
  Serial.print(" C\t|");
  Serial.print(fahrenheit);
  Serial.print(" F\t|");
  Serial.print(ohm);
  Serial.println(" Ohm");
}
Video
Sources
For this tutorial, I have used the following article from Wikipedia. (The basics of the NTC resistor are explained very well there).
Page “Thermistors”. In: Wikipedia, the free encyclopedia. Edit date: April 6, 2019, 09:33 UTC. URL: https://de.wikipedia.org/w/index.php?title=Hei%C3%9Fleiter&oldid=187287370 (retrieved: 26 April 2019, 09:23 UTC).
Furthermore, I used the tutorial on the thermistor by Adafruit, there the formulas for converting a resistor value into a temperature value are shown.
Here is the Wikipedia article on the Steinhart-Hart formula:
“Steinhart-Hart equation” page. In: Wikipedia, the free encyclopaedia. Edit date: 24 April 2018, 05:15 UTC. URL: https://de.wikipedia.org/w/index.php?title=Steinhart-Hart-Gleichung&oldid=176817890 (retrieved: 26 April 2019, 18:06 UTC).
Letzte Aktualisierung am: 10. March 2024

1 thought on “Arduino Lesson #10 – NTC Thermistor”