Via the serial interface of an Arduino, you can send and receive data. In this tutorial, I want to explain how to send & evaluate data via the serial communication pins RX & TX to another Arduino.

Parts list
For this tutorial, I use the following components:
- 2x Arduino UNO*,
- 2x breadboard cable*, 20 cm, male – male
- 2x USB Tyb B cable*
Note from me: The links marked with an asterisk (*) are affiliate links. If you make a purchase through these links, I will receive a small commission to help support this blog. The price for you remains unchanged. Thank you for your support!
Structure & Circuit
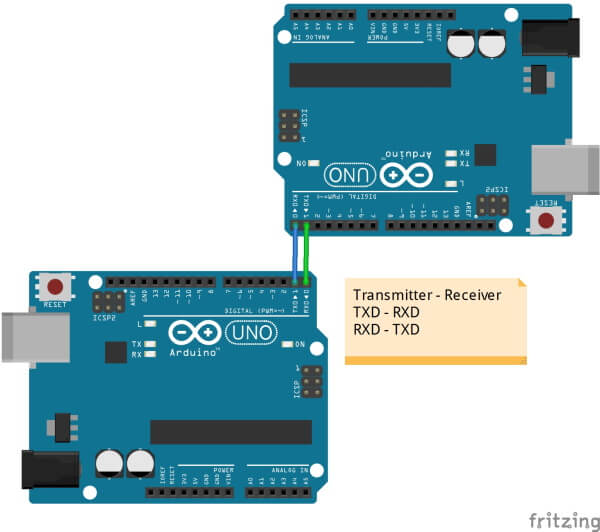
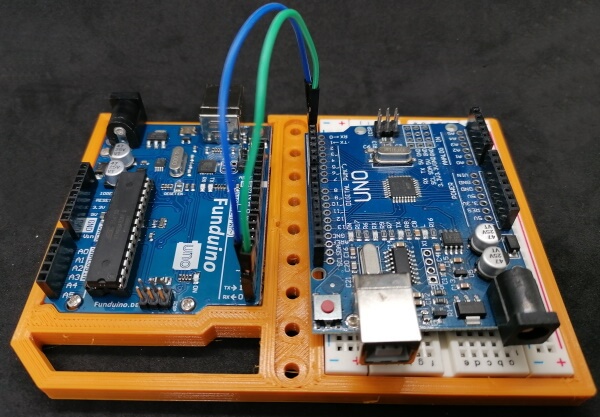
The two Arduino UNOs are cross-connected via the RX & TX pins respectively, i.e. RX goes to TX and TX goes to RX.
But please note if you want to upload some code to these devices you have to remove the wires between these devices. The pins RXD & TXD are used by USB-Serial converter and can also be used to program any other device like an Attiny85 microchip.
Programming
In the following, I want to show how to send data from one Arduino to another. For this purpose, the “Funduino” is the receiving unit and the “China clone” is the sending unit.
Program – Transmitter
The Transmitter would send data if the device will be restart with the reset button in the upper right corner of this device.
void setup() {
  //begin of serial communication with 9600 baud
  Serial.begin(9600);
  //send text "Hello World!" via serial port
  Serial.println("Hello World!");
}
void loop() {
  //empty
}
Program – Receiver
The Receiver will only listen at the serial interface to wait for data. If data available so the complete data will be stored into a variable and print out to the serial interface of the receiver.
void setup() {
  //begin of serial communication with 9600 baud
  Serial.begin(9600);
}
void loop() {
  //if serial data available, then...
  if (Serial.available() > 0) {
    //read the complete data into a variable
    String data = Serial.readString();
    //print data to serial interface
    Serial.print(data);
  }
}

