In this post, I like to show, how to connect and code a Photoresistor at an analog pin on the Arduino.
You get the photoresistor as simple electronic part or pre soldered at a tiny pcb. I show you a circuit with both of them.
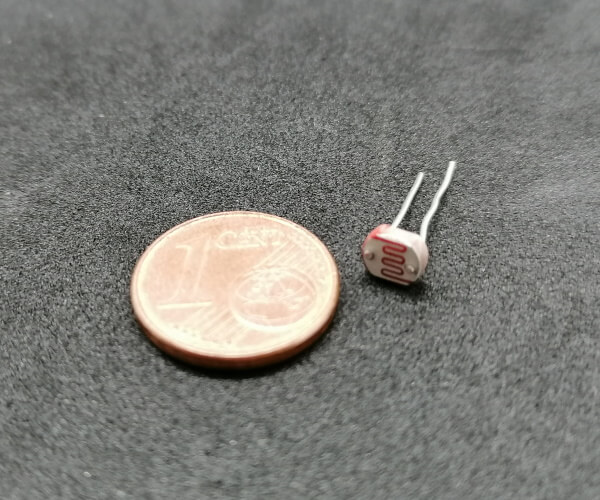
Buy a Photoresistor
You can find and buy this tiny part, at many shops. The easiest way to get this is at ebay.de for only €3 with shipping cost* for 10 pieces.
Note from me: The links marked with an asterisk (*) are affiliate links. If you make a purchase through these links, I will receive a small commission to help support this blog. The price for you remains unchanged. Thank you for your support!
If you can wait for your delivery, you find some very cheap options at aliexpress.com, banggood.com or whis.com.
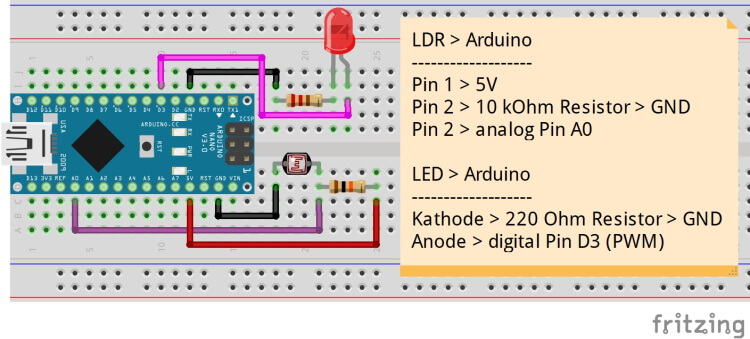
Tiny circuit Photoresistor (LDR) at Arduino
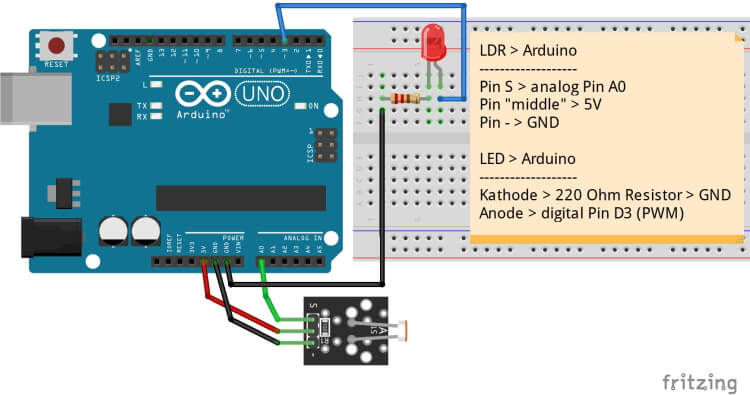
First, I like to show you a tiny circuit at Arduino with the simple electronic part. In addition to the LDR, you need a 10 kOhm resistor.
To rebuild the following circuit, you need a 5 mm LED with 220 Ohm Resistor. In the example for this circuit, I like to show how to control the LED brightness with an LDR, but more about that later.
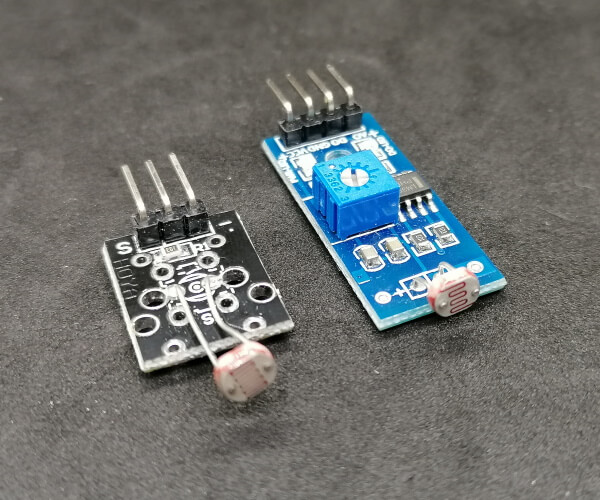
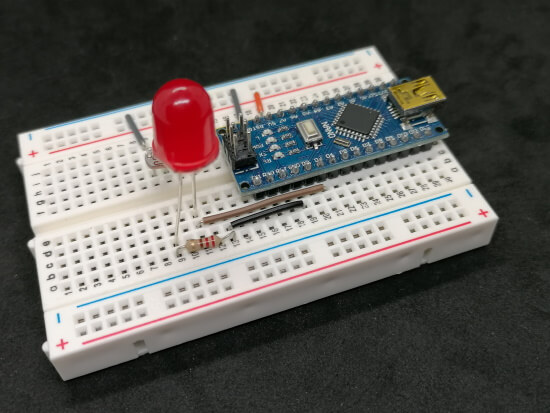
Circuit with ready to use pcbs with LDR Sensor at Arduino
If you have a ready to use LDR Sensor module, you don’t need an extra 10 kOhm resistor. The circuit is smaller than before.
Coding a LDR Photoresistor at Arduino
The photoresistor device will be connected to an analog pin and you will receive values from 0 to 1023. In my case I receive values from 300 and 730 this is regarding to the photoresistor.

//LDR resistor at analog pin A0
#define ldr A0
//LED connected to PWM pin D3
#define led 3

//define MIN and MAX value
const int LDR_MAX = 730;
const int LDR_MIN = 320;

void setup() {
  //begin serial communication with 9600baud
  Serial.begin(9600);
  //define that led pin works as output
  pinMode(led, OUTPUT);
}

void loop() {
  //read actual analog value (between 0 and 1023)
  int value = analogRead(ldr);
  //print value to serial interface
  Serial.print("Photoresistor value:");
  Serial.println(value);
  //map value from MIN to MAX into PWM values
  int ledPwmValue = map(value, LDR_MIN, LDR_MAX, 255, 0);
  //write mapped value as PWM signal to LED
  analogWrite(led, ledPwmValue);
}
Here you can find a short Video at YouTube from me where I show how the code above will work.
Letzte Aktualisierung am: 10. March 2024