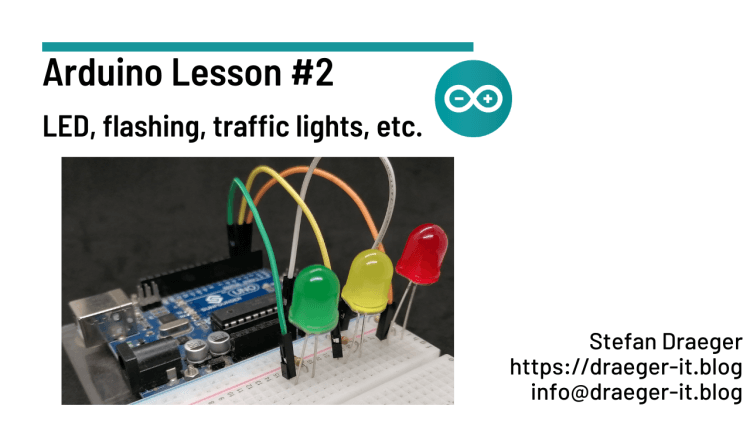
In this new post, I like to show how to flash a LED at Arduino, and later I would like to show a small traffic light.
In my last post Arduino Lesson #1 – setup & install Arduino IDE I have shown you how to setup and install the required tool Arduino IDE 2.0. If you don’t have installed this yet, please visit this post and get information how to handle this.
Required components
For the next examples, you need:
- Arduino UNO R3*,
- USB cable* (for printer and scanner),
- 400 Pin Breadboard*,
- seven Breadboardwires*,
- three LEDs* (red, yellow, green)
- three 220 Ohm Resistors*
Note from me: The links marked with an asterisk (*) are affiliate links. If you make a purchase through these links, I will receive a small commission to help support this blog. The price for you remains unchanged. Thank you for your support!
Arduino UNO R3 Pinout
Here you get first the pinout from the microcontroller Arduino UNO R3.
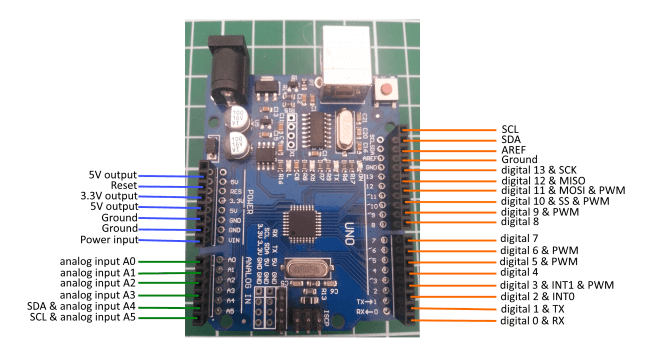
You need this layout to find the right pins for the following examples.
Examples with LEDs at Arduino UNO R3
Here now the examples with LEDs at Arduino UNO R3.
LED flashing
First, we want to make a LED flashing. This is very simple, so we only need to turn the LED ON and OFF.
#define redLed 8

void setup() {
  //direction of pin 8
  pinMode(redLed, OUTPUT);
}

void loop() {
  //set digital pin for redLed as HIGH
  digitalWrite(redLed, HIGH);
  //make a short brake with 500 milliseconds
  delay(500);
  //set digital pin for redLed as LOW
  digitalWrite(redLed, LOW);
  //make a short brake with 500 milliseconds
  delay(500);
}
Flashing with two LEDs
Next we add one more LED to our circuit and make alternate flashing with two LEDs.
//red LED is connected to pin 3
#define redLed 3
//yellow LED is connected to pin 2
#define yellowLed 2

void setup() {
  //direction of pin 3
  pinMode(redLed, OUTPUT);
  //direction of pin 2
  pinMode(yellowLed, OUTPUT);
}

void loop() {
  //active LED at pin 3
  digitalWrite(redLed, HIGH);
  //deactive LED at pin 2
  digitalWrite(yellowLed, LOW);
  //make a short brake for 250 milliseconds
  delay(250);
  //deactive LED at pin 3
  digitalWrite(redLed, LOW);
  //activate LED at pin 2
  digitalWrite(yellowLed, HIGH);
  //make a short brake for 250 milliseconds
  delay(250);
}
LED fade effect
A fade effect is when a LED slowly lights up and down. To code this effect, you have to use a PWM pin from your board. The PWM pins are marked with the tilde symbol (~).
At an Arduino UNO you have got 6 PWM pins (3, 5, 6, 10, 11).
The PWM signal is an analog value from 0 to 255. This signal will set with function analogWrite(<Pin>, <Value>). If the value zero is set the LED turns off and if 255 is set the LED will be light fully.
#define redLed 3

void setup() {
  //direction of pin 3
  pinMode(redLed, OUTPUT);
}

void loop() {
  //For Loop from 0 to 255
  for (int i = 0; i <= 255; i++) {
    //set PWM value
    analogWrite(redLed, i);
    //make a short brake with 25 milliseconds
    delay(25);
  }
}
Program a traffic light
At last we want to program a traffic light.
A traffic light has three lights, green, yellow and red. In the following image, you can see the states that will be displayed by a traffic light (in germany).

To set the states of all LEDs easier, we need a function with three parameters. The values from the parameters will be set to the LEDs.
//set states of LEDs
void setLEDstate(int redLEDState, int yellowLEDState, int greenLEDState) {
  digitalWrite(redLed, redLEDState);
  digitalWrite(yellowLed, yellowLEDState);
  digitalWrite(greenLed, greenLEDState);
}
With this function, we can set all states with one line of code in our loop.
//red LED is connected to pin 3
#define redLed 3
//yellow LED is connected to pin 2
#define yellowLed 2
//green LED is connected to pin 4
#define greenLed 4

//set states of LEDs
void setLEDstate(int redLEDState, int yellowLEDState, int greenLEDState) {
  digitalWrite(redLed, redLEDState);
  digitalWrite(yellowLed, yellowLEDState);
  digitalWrite(greenLed, greenLEDState);
  delay(500);
}

void setup() {
  //direction of pin 3
  pinMode(redLed, OUTPUT);
  //direction of pin 2
  pinMode(yellowLed, OUTPUT);
  //direction of pin 4
  pinMode(greenLed, OUTPUT);
}

void loop() {
  //only green LED is active
  setLEDstate(0, 0, 1);
  //only yellow LED is active
  setLEDstate(0, 1, 0);
  //only red LED is active
  setLEDstate(1, 0, 0);
  //red & yellow LED is active
  setLEDstate(1, 1, 0);
}
Letzte Aktualisierung am: 10. March 2024