Welcome to my latest blog post! Today I’d like to introduce you to an exciting new addition to the Arduino ecosystem: the Nano ESP32. This powerful microcontroller brings the popular ESP32S3 to the world of Arduino and MicroPython programming. Whether you’re a beginner venturing into the world of IoT or MicroPython, or an advanced user looking to develop your next product, the Nano ESP32 is the perfect choice. With Wi-Fi, Bluetooth, Arduino and MicroPython support, and HID capabilities, it offers an impressive array of features. Let’s explore the highlights of this fascinating board and find out why there are no more excuses to delay your projects!
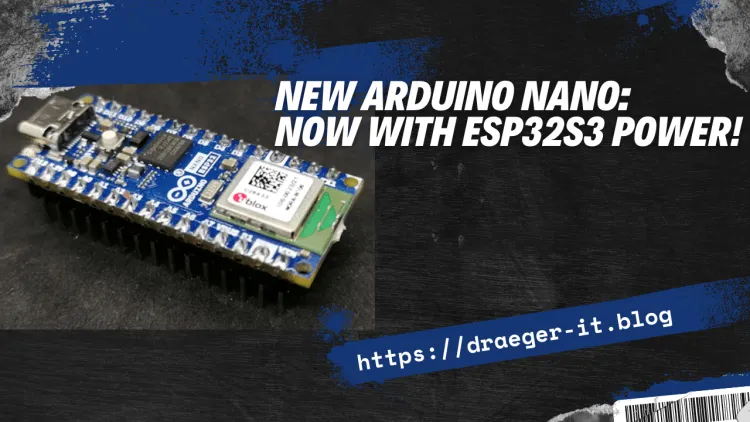
Technical specifications of the Arduino Nano ESP32S3
First of all, the hard technical specifications of the Arduino Nano with ESP32S3 chip:
| Microcontroller | u-blox® NORA-W106 (ESP32-S3) |
| CPU Speed | up to 240 MHz |
| Memory | 384 KB ROM, 512 KB SRAM, 16 MB (128 Mbit) external flash memory |
| Wi-Fi | u-blox® NORA-W106, 2,4 GHz, max. 1 MBit speed |
| Bluetooth | u-blox® NORA-W106, Bluetooth 5.0 |
| Inputvoltage | 6 V – 21 V |
| Voltage at GPIOs | 3.3 V |
| digital Pins | 14, All digital pins can be used as external interrupts and PWMs! |
| analog Pins | 8 |
| max. current consumption at GPIO | 40 mA |
| current sink | 28 mA |
| Interfaces | 2x UART, I2C, SPI |
| USB-Typ-C | |
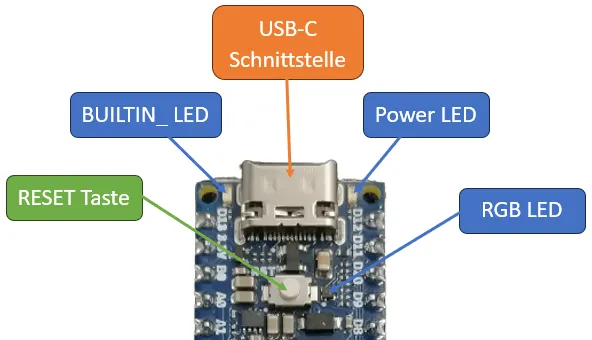
| Features | RGB LED (D14 – D16) BUILTIN_LED (D13) |
| Dimension | 45 mm x 18 mm |
Comparison to Arduino Nano V3
The new Arduino Nano with ESP32 chip is comparable to the outdated Arduino Nano V3. What stands out is that they are identical in pinout, so you can easily extend your Arduino Nano projects with the new microcontroller with WiFi and Bluetooth functionality.
At the moment you can get the new Nano ESP32S3 much cheaper (18 € plus shipping) in the official store than the old Nano V3 (21,60 € plus shipping).
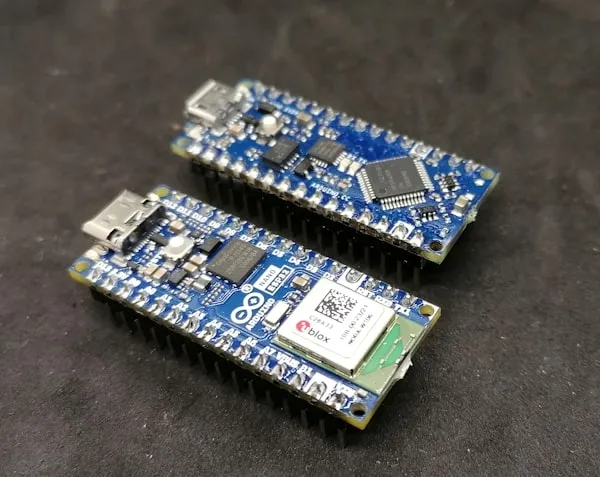
Of course, there are also small microcontrollers in the Arduino Nano factor which have WiFi and Bluetooth for a long time. However, these have a different pinout.
Technical data of the Arduino Nano V3
| Microcontroller | ATmega328 |
| Clock speed | 16 MHz |
| Memory | 32 KB Flash Memory, (2 KB for bootloader reserved), 2 KB SRAM |
| GPIOs | 22 digital Pins (6 PWM), 8 analog Pins |
| Features | BUILTIN_LED (D13) |
| Interfaces | UART, I2C, SPI |
| Micro-USB | |
| Inputvoltage | 7 V – 20 V |
| current consumption | 19 mA |
| max. current consumption at GPIO | 40 mA |
| Dimension | 45 mm x 18 mm |
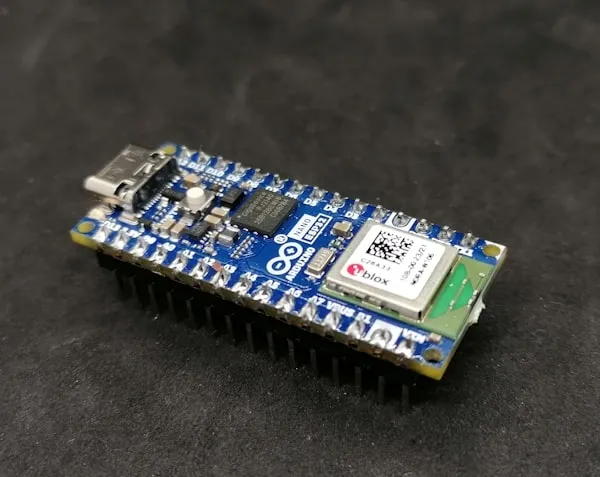
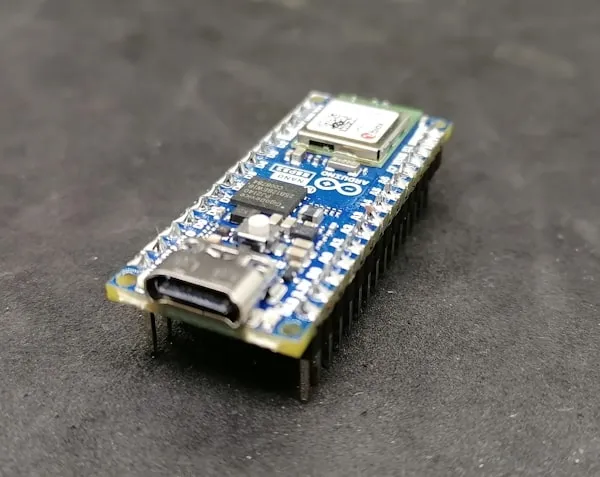
Reference of the Nano ESP32S3
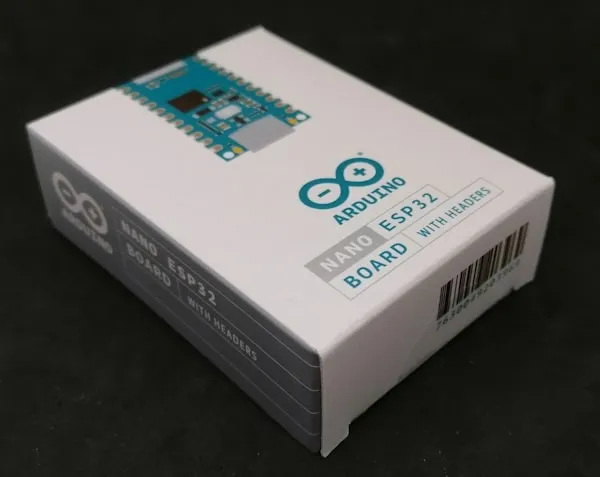
The microcontroller is currently available exclusively at the Arduino Store for 18 € plus shipping. The scope of delivery only includes the microcontroller and as usual a few stickers and a warranty card.
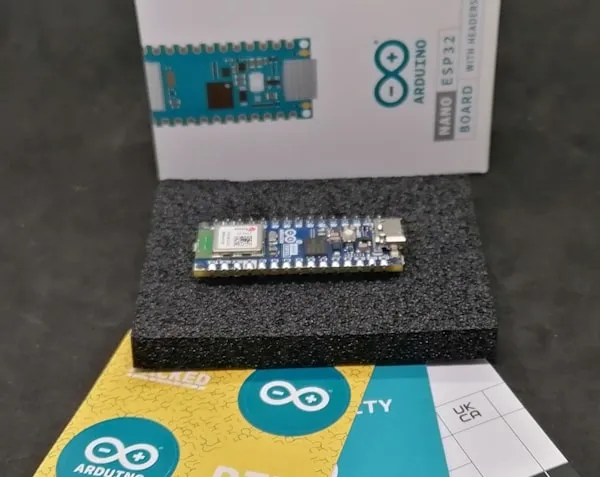
Due to the USB-C interface, everyone should actually have such a cable at home, which saves money. Especially since the microcontrollers usually come with these quite short cables, which cannot be used in normal cases anyway.
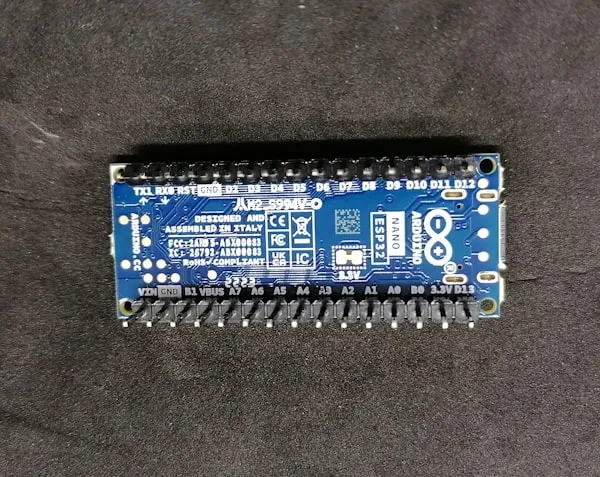
Pinout
The following is the pinout of the Nano ESP32. You can see here that all digital pins serve as PWM pins, this is a clear plus point compared to the Arduino Nano V3.
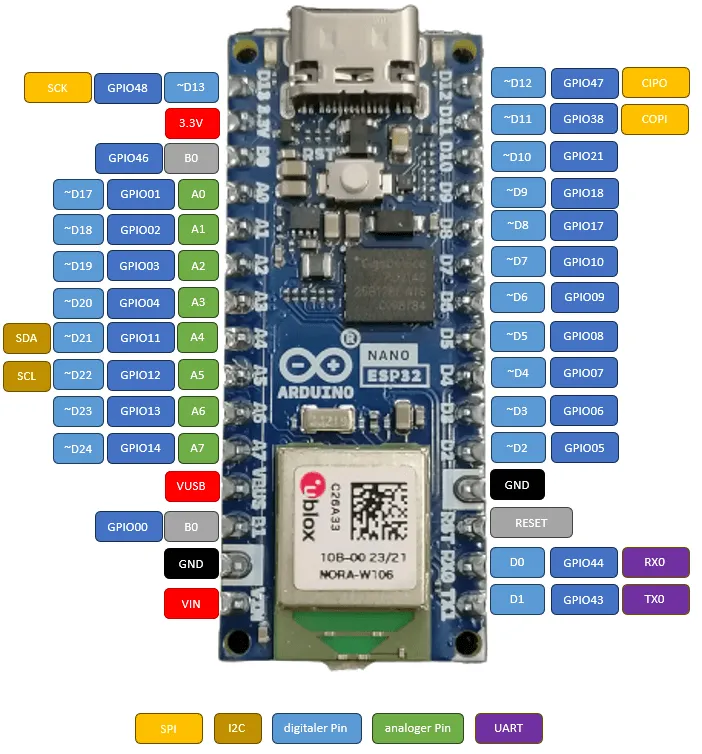
Additional features are the USB-C interface and the RGB LED.
Energy consumption
However, due to the ESP32S3 and the thus included features of WiFi & Bluetooth, this microcontroller requires significantly more power than its predecessor.
The manufacturer states that this module consumes 7 µA in deep sleep and 240 µA in light sleep mode.
Current consumption in comparison
| Microcontroller | current consumption | max. current consumption per GPIO | Current sink |
|---|---|---|---|
| Arduino Nano V3 | 19 mA | 40 mA | |
| Arduino Nano ESP32S3 | 40 mA | 28 mA |
Programming the Arduino Nano ESP32S3
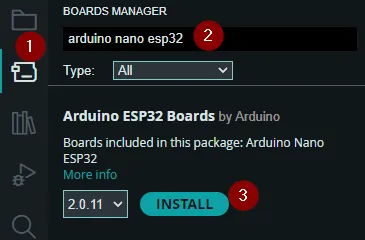
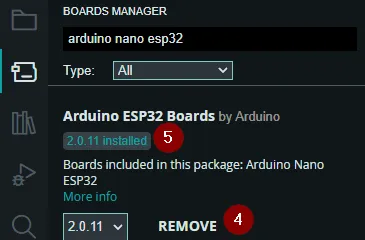
The microcontroller can be programmed in the Arduino IDE 2.0 and with MicroPython in the Arduino Lab. For the Arduino IDE 2.0 we first need a board driver which we have to install via the internal board manager.
Programming the onboard RGB LED
In the following I would like to show you how to program the onboard RGB LED via the Arduino IDE.
The RGB LED is connected to the digital pins D14 to D16 and is a simple RGB LED with quasi 4 legs. So no NeoPixel, WS18B20 or similar!
//pin for the red LED - D14
#define ledRed 14
//Pin for the green LED - D15
#define ledGreen 15
//Pin for the blue LED - D16
#define ledBlue 16

void setup() {
  //start serial communication with
  //9600 baud
  Serial.begin(9600);
  //define that the pins of the RGB LED act as
  //output
  pinMode(ledRed, OUTPUT);
  pinMode(ledGreen, OUTPUT);
  pinMode(ledBlue, OUTPUT);
}

void loop() {
  //activate / deactivate the red LED
  Serial.println("red");
  digitalWrite(ledRed, HIGH);
  delay(1000);
  digitalWrite(ledRed, LOW);

  //activate / deactivate the green LED
  Serial.println("green");
  digitalWrite(ledGreen, HIGH);
  delay(1000);
  digitalWrite(ledGreen, LOW);

  //activate / deactivate the blue LED
  Serial.println("blue");
  digitalWrite(ledBlue, HIGH);
  delay(1000);
  digitalWrite(ledBlue, LOW);
}
The small program now makes the onboard RGB LED light up in the colors red, green and blue.
Letzte Aktualisierung am: 08. August 2023