In this new post at my technic blog, I like to show you how to code an IR Remote control at Arduino UNO R3.
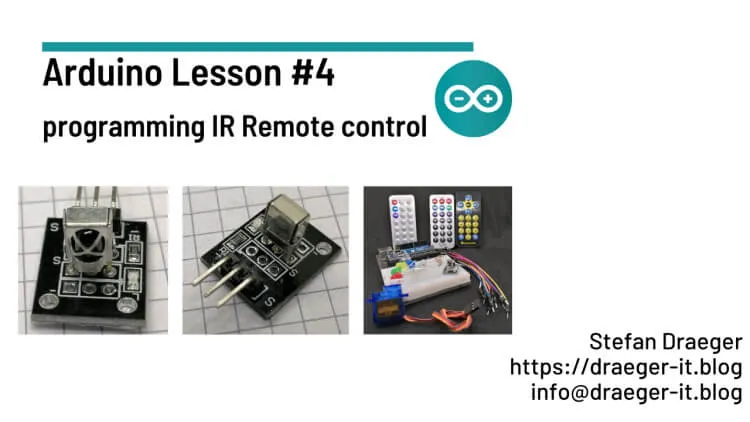
In my last post Arduino Lesson #3 – control tiny servo motor SG90 I show you how to code and control a servo motor. In this post, I want to control this servo motor with an IR remote control.
Required components
If you want to rebuild the following samples, you need:
- an Arduino UNO R3*,
- USB-Type-B datacable* (for printer or scanner),
- IR Receiver module*,
- some LEDs* with 220 Ohm resistor*,
- a servo motor type SG90*,
- some Breadboardwires*, male – male, 10 cm,
- a 400 pin Breadboard*
Note from me: The links marked with an asterisk (*) are affiliate links. If you make a purchase through these links, I will receive a small commission to help support this blog. The price for you remains unchanged. Thank you for your support!
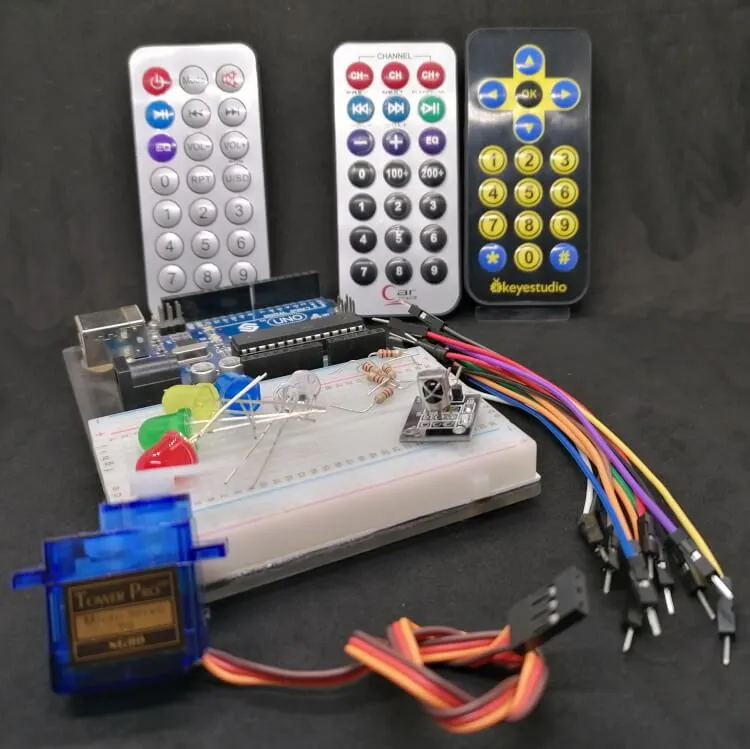
You don’t have to buy an IR remote control, for this post you can also use your remote control from your TV or satellite receiver. This will save some money for other upcoming lessons.
IR Remote control module
The easiest way to read signals from an IR Remote control is to use a module. This module has 3 pins.
- – > GND
- middle > 5V
- S > data line
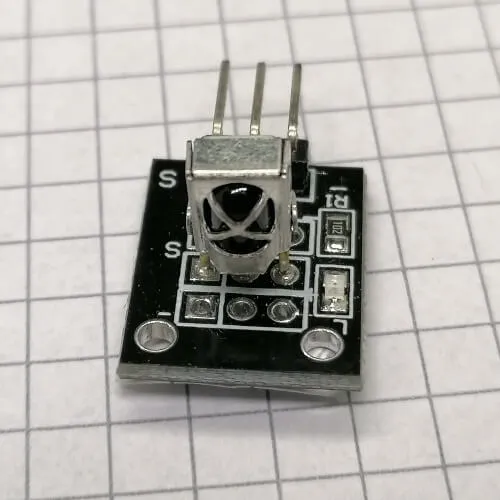
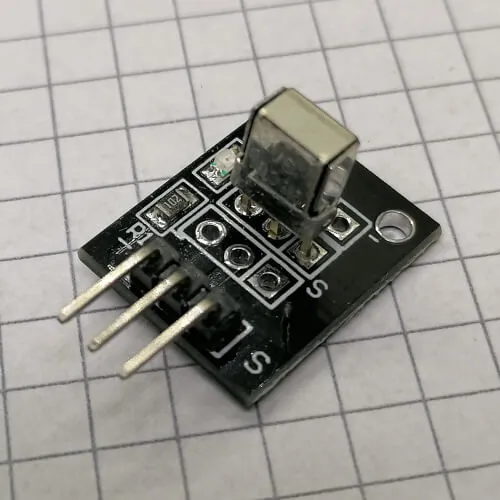
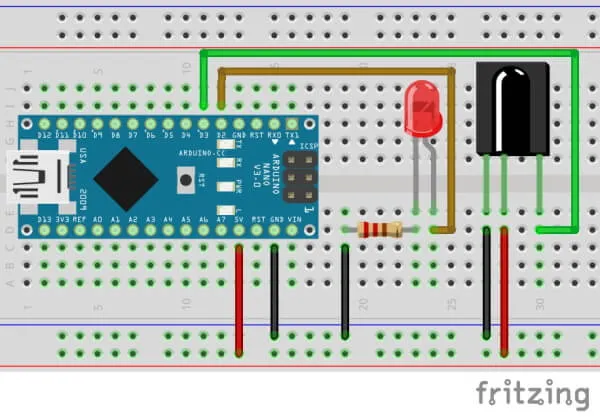
Connect an IR Remote control module at an Arduino UNO
The connection to an Arduino UNO is very simple, you only have to connect three wires. The pin with symbol minus goes to GND, the middle pin to 5V and the pin with “S” have to connect to a digital pin.

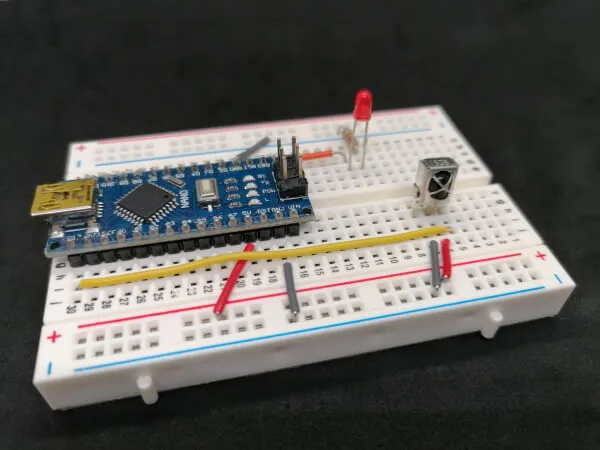
Build your own tiny IR Receiver module at Breadboard
An IR Remote control module can easily build with the following parts:
- IR Receiver Diode,
- 220 Ohm Resistor,
- tiny, red, 3 mm LED,
- a 400 Pin Breadboard,
- some Breadboardwires or Jumperwires
Programming an IR Remote control Module
The next following samples will work with the ready to use module and the DIY IR Receiver circuit.
First, you need a library to read the IR receiver led signals, in your Arduino IDE is such a library pre-installed. So you don’t have to install this.
Here is a small sample of how to read and handle such signals.
//library to handle IR Receiver Diode
#include <IRremote.h>

//tiny, 3 mm Status LED at digital pin 13
#define statusLed 13
//IR Receiver Diode connected at digital pin 8
#define irReceiverDiode 8

//some connected LEDs
#define ledGreen 3
#define ledYellow 4
#define ledRed 5
#define ledBlue 6

//create object with attached
IRrecv irrecv(irReceiverDiode);
//field for results
decode_results results;

void setup() {
  //define pins from LEDs as OUTPUT
  pinMode(ledGreen, OUTPUT);
  pinMode(ledYellow, OUTPUT);
  pinMode(ledRed, OUTPUT);
  pinMode(ledBlue, OUTPUT);
  pinMode(statusLed, OUTPUT);

  //define pin from IR Receiver Diode as INPUT
  pinMode(irReceiverDiode, INPUT);

  //begin communication
  irrecv.enableIRIn();
  //begin serial communication with 9600 baud
  Serial.begin(9600);
}

void loop() {
  //if successful receive some data, then ...
  if (irrecv.decode(&results)) {
    //store data in field value
    int value = results.value;
    //consume the data and clear
    irrecv.resume();
    //print the value to the serial interface
    Serial.println(value);
    //activate status LED
    digitalWrite(statusLed, HIGH);
    //tiny brake to light up the LED
    delay(75);
    //deactive status LED
    digitalWrite(statusLed, LOW);
  }
}
When you run this sample and press buttons on your IR remote control, the value from your key will write to the serial interface.

Next, you can use this numbers in a Switch-Case construct to control some LEDs.
//fields to store status of LEDs
bool ledGreenActive = false;
bool ledYellowActive = false;
bool ledRedActive = false;
bool ledBlueActive = false;

void loop() {
  //if successful receive some data, then ...
  if (irrecv.decode(&results)) {
  ...
     //handle received data...
     switch (value) {
        case 12495: ledGreenActive = !ledGreenActive; break;
        case 6375: ledYellowActive = !ledYellowActive; break;
        case 31365: ledRedActive = !ledRedActive; break;
        case 4335: ledBlueActive = !ledBlueActive; break;
     }

     resetLEDs();
   ....
}

//set actual states to LEDS
void resetLEDs() {
  digitalWrite(ledGreen, ledGreenActive);
  digitalWrite(ledYellow, ledYellowActive);
  digitalWrite(ledRed, ledRedActive);
  digitalWrite(ledBlue, ledBlueActive);
}
Here you get the complete Code to download.
Prevent message “The function decode(&results)) is deprecated and may not work as expected! Just use decode() without a parameter and IrReceiver.decodedIRData.”
If you run the above example, you will see the following message on the serial port.
The function decode(&results)) is deprecated and may not work as expected! Just use decode() without a parameter and IrReceiver.decodedIRData.<fieldname> .
The code will work, but if you want to prevent this message, you have to rewrite this code a little bit.
//library to handle IR Receiver Diode
#include <IRremote.h>

//tiny, 3 mm Status LED at digital pin 13
#define statusLed 13
//IR Receiver Diode connected at digital pin 8
#define irReceiverDiode 8

//some connected LEDs
#define ledGreen 3
#define ledYellow 4
#define ledRed 5
#define ledBlue 6

//fields to store status of LEDs
bool ledGreenActive = false;
bool ledYellowActive = false;
bool ledRedActive = false;
bool ledBlueActive = false;

void setup() {
  //define pins from LEDs as OUTPUT
  pinMode(ledGreen, OUTPUT);
  pinMode(ledYellow, OUTPUT);
  pinMode(ledRed, OUTPUT);
  pinMode(ledBlue, OUTPUT);
  pinMode(statusLed, OUTPUT);

  //define pin from IR Receiver Diode as INPUT
  pinMode(irReceiverDiode, INPUT);

  //begin communication
  IrReceiver.begin(irReceiverDiode, ENABLE_LED_FEEDBACK);
  //begin serial communication with 9600 baud
  Serial.begin(9600);
}

void loop() {
  //if successful receive some data, then ...
  if (IrReceiver.decode()) {
    //store data in field value
    int value = String(IrReceiver.decodedIRData.command, DEC).toInt();
    //consume the data and clear
    IrReceiver.resume();
    //print the value to the serial interface
    Serial.println(value);
    //activate status LED
    digitalWrite(statusLed, HIGH);
    //tiny brake to light up the LED
    delay(75);
    //deactive status LED
    digitalWrite(statusLed, LOW);

    switch (value) {
      case 12: ledGreenActive = !ledGreenActive; break;
      case 24: ledYellowActive = !ledYellowActive; break;
      case 94: ledRedActive = !ledRedActive; break;
      case 8: ledBlueActive = !ledBlueActive; break;
    }

    resetLEDs();
  }
}

//set actual states to LEDS
void resetLEDs() {
  digitalWrite(ledGreen, ledGreenActive);
  digitalWrite(ledYellow, ledYellowActive);
  digitalWrite(ledRed, ledRedActive);
  digitalWrite(ledBlue, ledBlueActive);
}
Letzte Aktualisierung am: 10. March 2024