In this and upcoming posts, I would like to give you an introduction to programming the ESP32 with MicroPython. However, before we can start this little course, we need to get to know this microcontroller a little better and flash it.
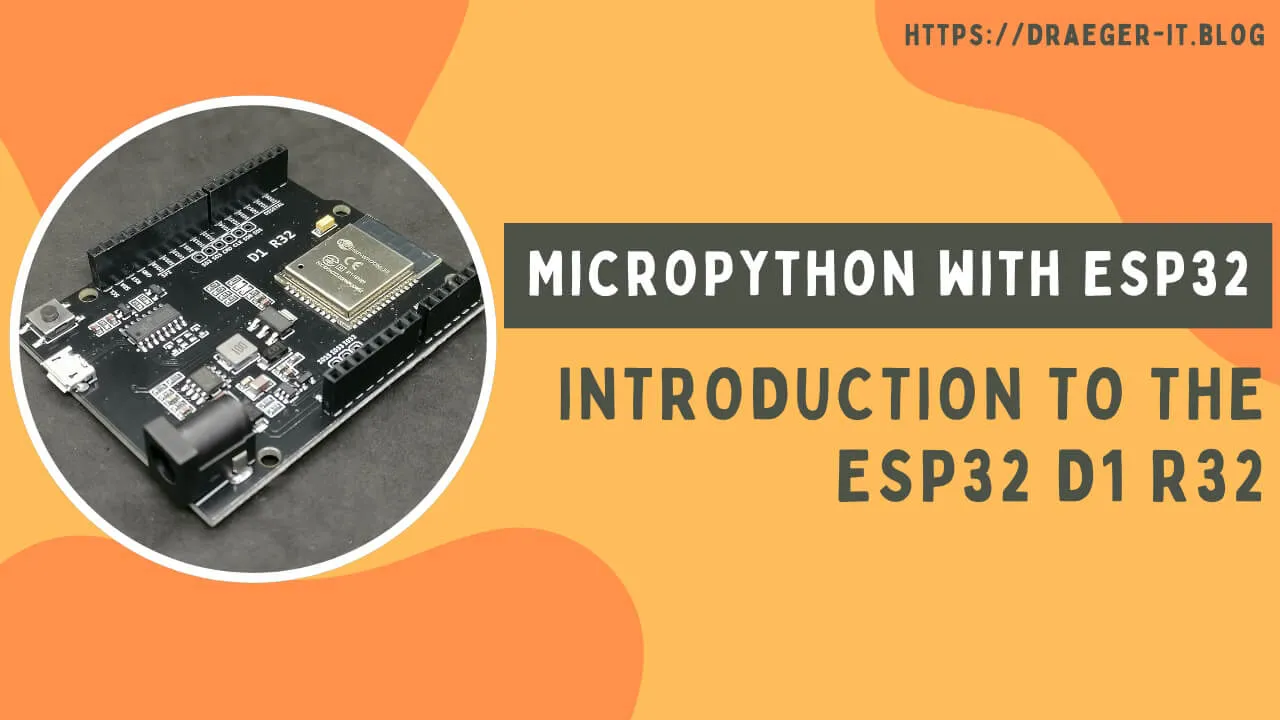
What is special about the ESP32 D1 R32?
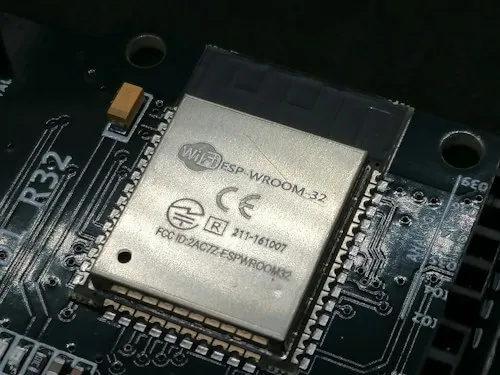
This microcontroller with an ESP-WROOM-32 chip has the form factor of an Arduino UNO R3/R4 and therefore the layout is familiar and particularly suitable for beginners as you don’t have to change much.
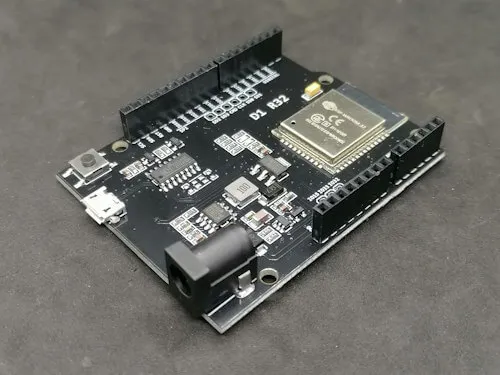
The main advantage is that you can plug in a multifunctional shield and start programming without having to worry about a circuit.
Technical data of the ESP32 D1 R32
The ESP32 D1 R32 is a powerful development board with the following technical specifications:
| Technical Data | Specifications |
|---|---|
| Operating Voltage | 5V-12V DC |
| Current | 250mA (maximum) |
| Minimum Operating Current | 20mA (without WiFi) |
| WiFi | 802.11 b/g/n/e/i (up to 150 Mbps) |
| Connector | Micro-USB with CH340 driver |
| Memory | 4 MB Flash memory |
| Clock Frequency | 240 MHz |
| Dimensions | 68 mm x 53 mm |
| Digital I/O Pins | 20 (3.3 V) |
| Analog Input Pins | 6 |
Important: The ESP32 has a voltage of 3.3V at its digital inputs/outputs, this is significantly less than the Arduino UNO R3, and therefore you must take this into account in your planned circuits!
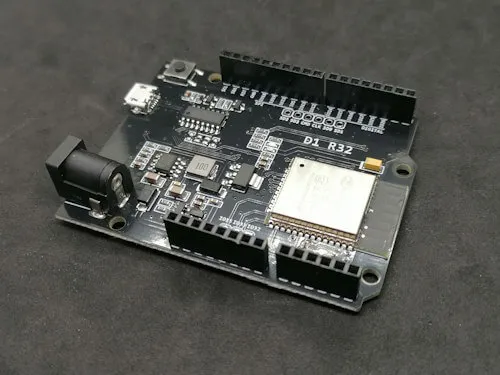
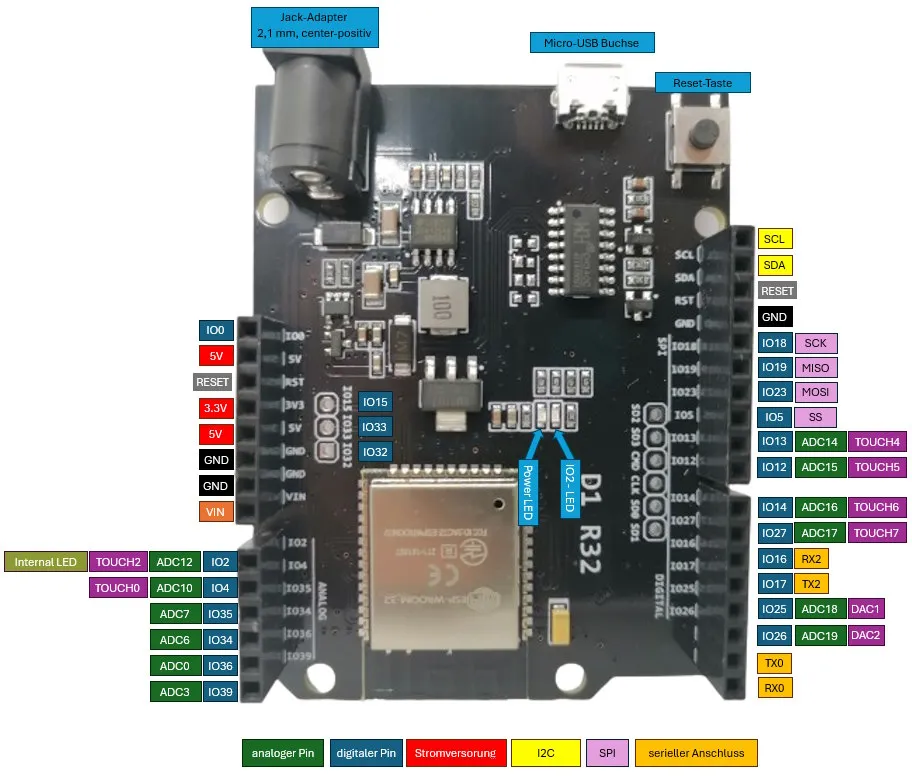
Structure & pinout of the microcontroller
The microcontroller has a micro-USB socket which can be used to connect it to the computer for programming. Alternatively, a power bank can be connected to it to supply it with mobile power.
Connecting the microcontroller to the PC
The microcontroller is connected to the PC via the micro-USB socket. A serial-USB converter of the type CH340 is installed on the device, so that we can integrate the microcontroller correctly, we have to install a driver.
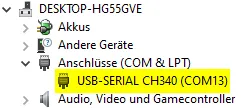
There are various CH340 drivers, and I was able to install it correctly using the driver provided by Wemos.
Flashing the ESP32 D1 R32 for programming in MicroPython
In order to program the microcontroller in MicroPython, we need to flash it with a new firmware. We can either use the command line tool esptool or the simple development environment Thonny. In the following, I will explain how to flash the ESP32 D1 R32 in MicroPython with the Thonny IDE.
In the first step, we select “Configure interpreter …” at the bottom right of the Thonny IDE.

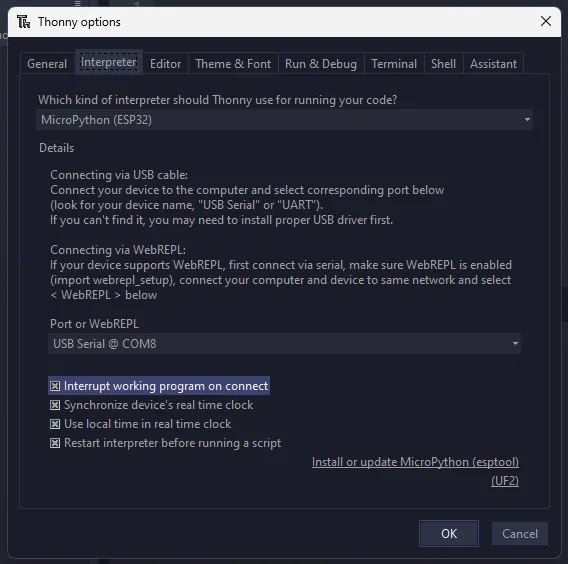
Then set the interpreter to “MicroPython (ESP32)” and the correct port.
If you have several serial devices connected to the PC, you should first check in the Device Manager to which COM port the ESP32 is connected.
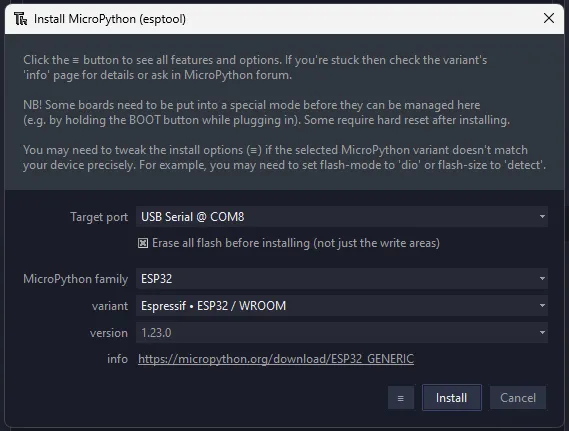
Finally, click on the “Install or update MicroPython (esptool)” link at the bottom right.
Here you have to make the following settings (see graphic).
These instructions also work for other devices such as the Raspberry Pi Pico / Pico W, you only have to adjust the data for MicroPython family & variant.
The process is then started with the “Install” button.
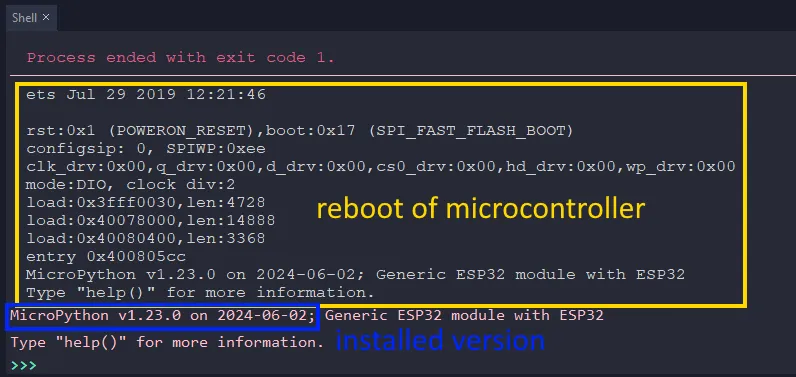
When the process is successfully completed and the windows are closed, you should see the following output in the command line. Of course, the version number may have been incremented by the time you read this post, but the information remains the same.
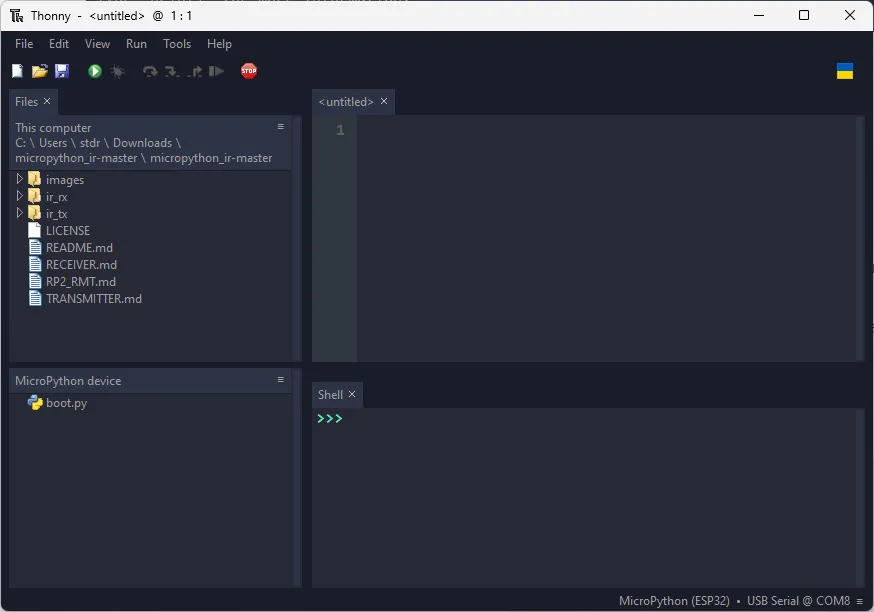
Overview of Thonny IDE
Let’s take a closer look at the Thonny application below.
In the title bar, we find the file name of the currently open file / selected tab and the cursor position.
The toolbar contains the buttons for starting and stopping scripts.
If we look at the left area, we will find a small file explorer with which we can open files and also copy them to the microcontroller via the context menu.
The field labeled “Output” displays the output from the code. You can also make entries there.
Outlook for upcoming articles
This was the first part of my series “MicroPython with ESP32” in the next article I would like to show you the programming language in more detail and present small programs with it.
So stay tuned…
Letzte Aktualisierung am: 03. July 2024